background

Wednesday, April 24, 2013

Night On The Town

The other day I showed a pic of a 2nd pull of a Gelli print that was pretty cool on its own.  However, it kept speaking to me...shouting actually...that I needed to do something with it.  As I stared at the print all I could think of was night time - trees...lights of the city shining through...the last of the blue sky fading...

So, I used the Cityscape stencil and some black acrylic to add the city...it needed some lights on in the windows so once it dried I offset the stencil just slightly and added some white on top.  Then I ripped some strips of paper from a dictionary and adhered them to the edges of the page.

The other night I had stamped some Dian Reavely Couture Collection stamps onto some of my Gelli prints and cut them out.  I layed this on top and glued it down.  I did a wash of white over the dictionary pages...then added some Payne's Gray as a frame.  Liking it at this point....but it needed something....so a splatter some teal ink over the top left.

I'm not yet sure it is completely finished...but I'm liking it so far.


The starting point...


Sunday, April 21, 2013

More Fun Than Watching Paint Dry

Actually...it was pretty fun watching paint dry!

I had an idea in my head and wanted to see if it would work.  I wanted to see if multiple layers of paint would yield a certain effect if I let it dry in between and didn't pull any prints.  This was the result...and below I've shown the stages of how I arrived at this result.  It wasn't quite what was in my head, but was fairly close.  I'm not disappointed in the results and will definitely use these prints.

First pull...fall/winter tree

 
Second pull....not at all what I was expecting, but pretty cool nonetheless.
 
 
And this is how I got here.  I started with a thin layer of black and pressed my foam placemat onto it to give me a circular pattern (very hard to see in this pic).
 

Next I added a layer of greens and blue/greens and pressed in the "holey" drywall tape for texture.


The next layer was oranges and reds and cardboard for texture.


The final layer was blue and brown with bubble wrap and swipe of a catalyst tool for texture.
 

I then layed the Crafters Workplace branches stencil on the Gelli plate and took the first print.


And the second print


I then added a layer of white and took another print...


There was still some dregs on the plate so I added some light green paint and took a final print.


So as you can see...watching paint dry can be a whole lot of fun!


Friday, April 19, 2013

Swirls, Circles and Flourishes

Yes, I was definitely in the zone last night....and loving every minute of it.  If you haven't already tried Gelli Printing I urge you to try it.  It is so much fun and you'll be amazed by how relaxing it is...how it gets your creative juices flowing...how wonderful things just happen in front of your eyes!

This is one pull...greens and yellows.  I used my favourite big bubble wrap and then pressed chipboard circles in several sizes over the page.  When I pulled the paper up it pulled colours and bits from the Gelli Plate from previous prints and this is the result.  See the bottom left corner...the shell embossing folder is showing through...an unexpected bonus!   


This one was definitely a happy accident.  I had done a pull with the blues and bubble wrap...then got distracted in conversation and it dried before I had pulled too much paint off.  So....I layered some pink paint on and pressed my chipboard flourishes onto the paint to pull it up.  This is the resulting print.  I can feel a fun journal page coming my way with this page.


The bottom layer of this page was done using a flourish stamp and circles.  I then did another layer which was a second pull using the shell embossing folder for the design. 


Another one of those single pulls that yield all the bits below...I just love these ones!


The initial layer of this one was done using "holey" drywall tape.  It pulled up bits from previous pulls and was quite cool.  I masked off some circles and then did a layer using a foam placemat.  The final layer was the "dregs" from one of the bird prints I had done (see previous post).  You can just see the outline of a bird in the upper portion of the black section. It will be fun to tease this image out on a journal page.


Well that's it for now...these were not all of the prints I did last night...but definitely some of my favourites.

Under the Sea

As previously noted, I have been following along with Carolyn Dube's Gelli Printing Workshop. I had to laugh at the one workshop when she used a mermaid stencil as I had just finished cutting my own.  My DD had let me know she was thinking of getting a mermaid tattoo so we had been looking at mermaid images.  While I was making the mermaid stencil I also made some of shells and seahorses.  This batch of prints were made using these stencils.

This one was a second pull using the shell stencil.  I then used the orange crate netting under the mermaid stencil.  Definitely a journal page...


This is a close up of the shell.


The base of this one is a second pull and I love all the bits pulled from previous prints.  You can even see the imprint of the branch made from fun foam in the upper left.  I then used magenta and blue and the shell stencil for the next layer.  The top layer is my mermaid stencil.  I used the tip of a piece of cardboard to make lines for her hair and the embossing folder pressed over her lower body for her scales.  I love this one and am definitely going back to work on it more tonight...thinking Pan Pastels....


This page is still in progress....but loving it already! 


I used the seahorse and mermaid stencils as masks for this one...another fun journal page. 


Ghosts prints and shell stencils....lots of yumminess happening on this page already...

Birds of a Feather

Last night I was in the zone!  I went to the Thursday night Art Journal Group at the Art House Studio and decided that instead of working in my art journal I would take my Gelli Plate and just play....and play I did.  I did so many prints that I am going to post them in three different posts today and tomorrow.

I've been following along with Carolyn Dube's Gelli Printing Workshop (see button at the right). This first batch was done using handmade stencils of birds.

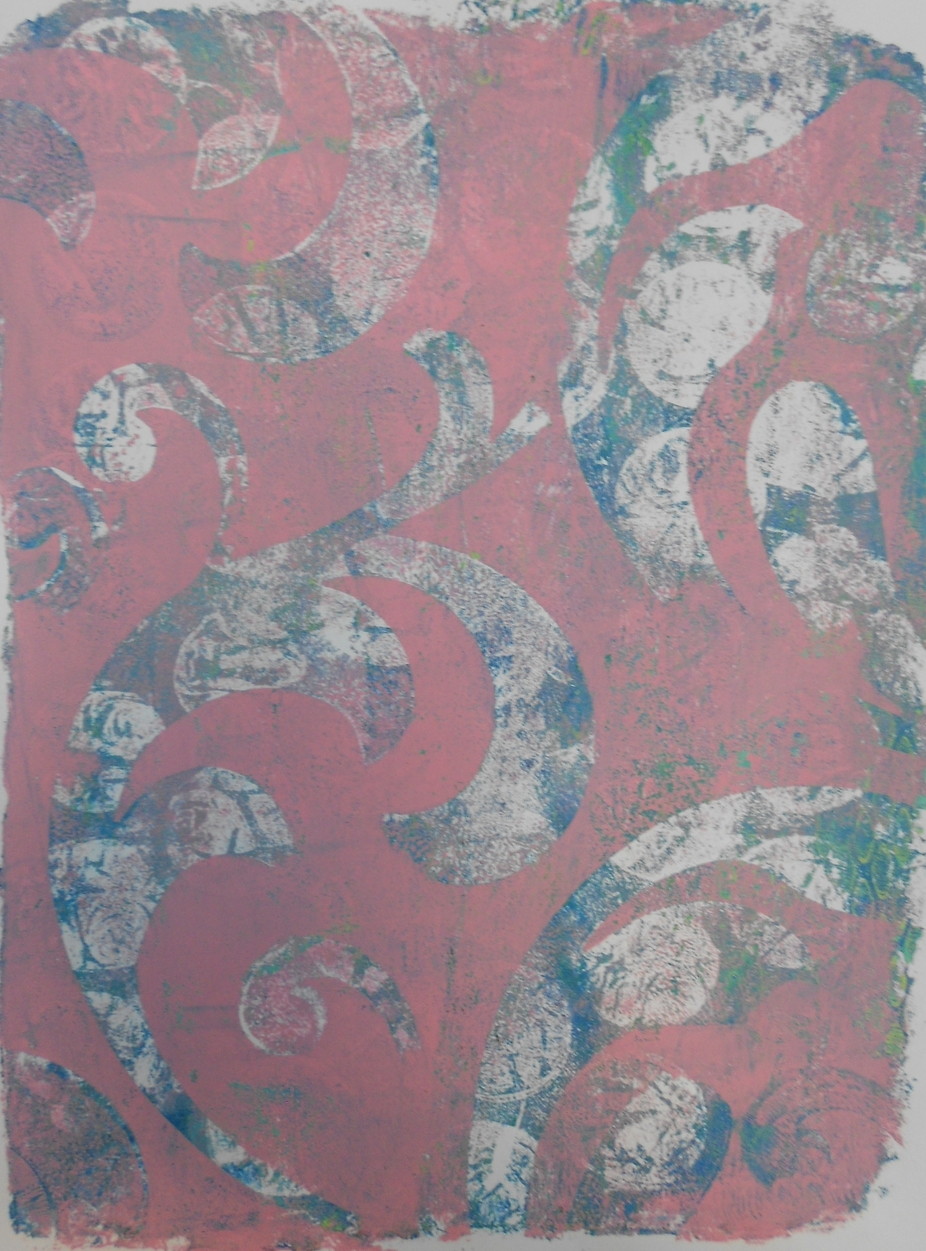
This one is probably my favourite print of the night.  A few layers were done for the background...one using a piece of cardboard covered with "holey" drywall tape and the top layer done using chipboard flourishes.  Finally I layed my bird stencil over magenta paint and added that as the final layer. 


This next one was done using the same stencil, only this time using the cut-out part as a mask.  The blue circles were done using a foam placemat found at the dollar store....one of my favourite dollar store finds (see earlier posts on my dollar store haul!...so much fun stuff to be found there!).  I can see this one being a fun journal page...


Another favourite from the night.  I used a die cut bird from my scrapbook supplies as a mask for this one after pressing my chipboard flourish onto the paint to lift most of it off (those chipboard pieces are now gorgeously covered with paint and will be used on a layout soon I'm sure).


For this one I used an embossing folder to get the design in the background.  The birds were then done using the netting found over a box of clementines and the bird stencil. 


This one produced a big "oooohhhhhhh!" when I pulled it off the Gelli Plate.  This was just one layer but I loved the way it pulled up all the bits and colours from previous pulls.  I used the die cut bird again as well as a "branch" made from fun foam...and of course my favourite big bubble wrap.


Another handmade stencil of birds.  This time I layered it in black on top of this colourful print.  I would love to try this again, maybe with a parrot or toucan stencil. I love how the circle portion (again from the foam placemat) in the upper right looks like the sunset....


Birds in the moonlight anyone?  This is another favourite.  A few layers...and ending with the birds situated over one of the light circles.